Fluffy & Quick Buttermilk Biscuits
Ever wonder how to make bakery-style biscuits at home? These baking buttermilk biscuits are fluffy, quick, and rich with tradition. Let's bake some together!

- Fluffy & Quick Buttermilk Biscuits: A Southern Tradition
- Essential Ingredients Guide
- Professional Cooking Method: Baking Buttermilk Biscuits - Fluffy & Quick
- Pro Tips & Secrets: Your Path to Perfect Biscuits
- Perfect Presentation: Making Your Biscuits Shine
- Storage & Make-Ahead: Keep ‘Em Fresh
- Creative Variations: Spice It Up!
- Complete Nutrition Guide: Know Your Biscuits
- Expert FAQ Solutions: Got Questions? I’ve Got Answers!
- In Conclusion: Get Your Biscuit Game On!
- Recipe Card
Fluffy & Quick Buttermilk Biscuits: A Southern Tradition
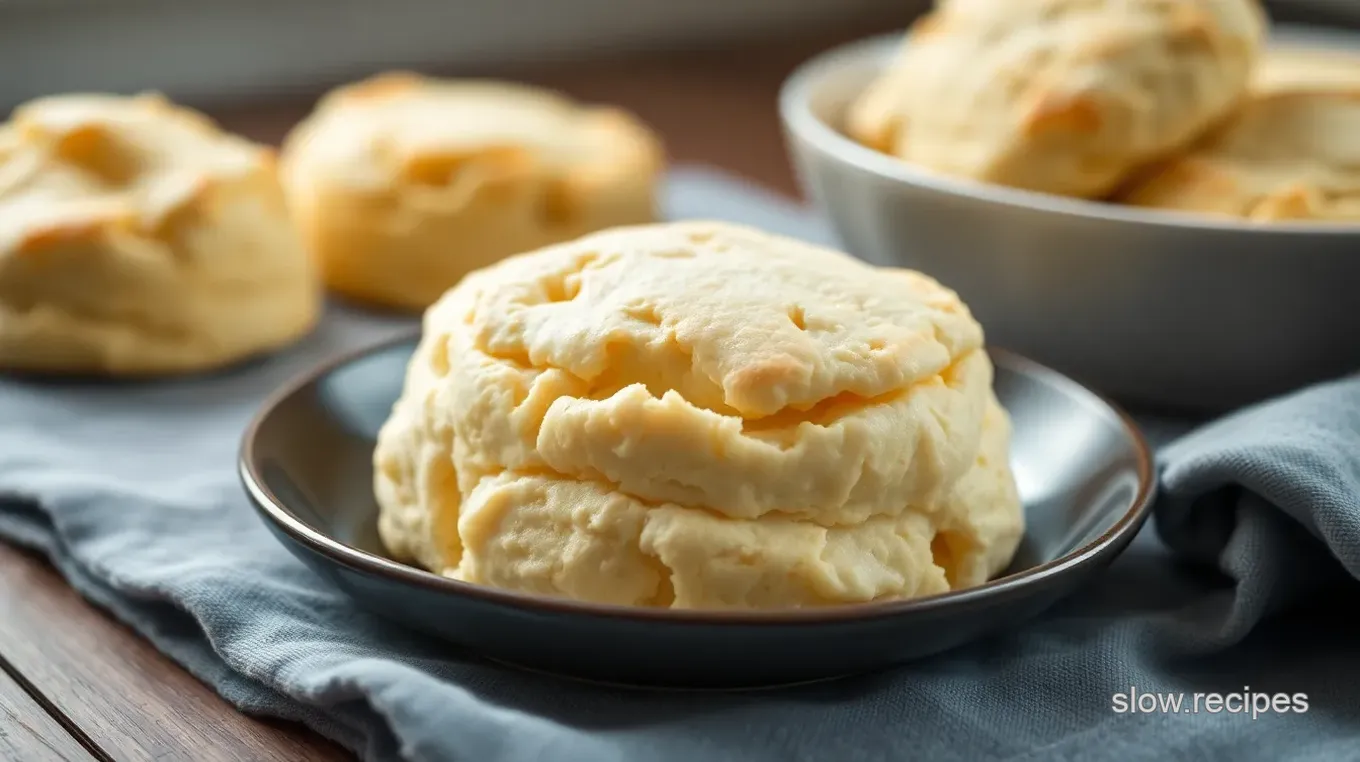
You know that smell of baking wafting through the air that makes your heart skip a beat? well, let me tell you, there’s nothing quite like the aroma of baking buttermilk biscuits - fluffy & quick filling your kitchen.
I still remember the first time i baked these little clouds of joy. my grandma had a way of making everything look so easy.
One day, i decided to channel my inner southern belle and give it a go. an hour later, sticky fingers and a flour-covered shirt said it all–i was hooked! so, if you’re ready to learn how to make biscuits that rival any southern diner, keep reading!
A Little About Buttermilk Biscuits
The history of buttermilk biscuits is rich and mouthwatering. originating in the south, these homemade biscuits have been a staple on breakfast tables for generations.
Folks would whip them up as a quick and easy way to feed a crowd, and honestly, they still do.
They’ve become a classic comfort food recipe that’s relevant now more than ever, appearing at brunches across america.
This easy biscuit recipe doesn’t take much time, either. you’re looking at about 10 minutes of prep time , a quick chill, and just 15 minutes in the oven .
All in all, you can have warm, fluffy biscuits on your table in 35 minutes ! not too shabby, right? plus, this recipe yields 8 tender biscuits , looking magnificent and ready for anything from morning coffee to soppin’ up gravy at dinner.
Why These Biscuits Are the Best
As if you needed more reasons, let’s talk about the benefits of making these flaky delights. first off, health-wise , they’re lightened up with the inclusion of buttermilk, which provides a nice dose of calcium.
Biscuits can often be heavy, but this recipe’s combination keeps them on the tender and flakier side — no one likes a brick! you get to enjoy biscuits that are warm, buttery, and downright delicious!
These fluffy biscuits are perfect for any occasion . whether you’re stacking them high on a family breakfast table or using them for shoveled sausage gravy, they fit right in.
They shine at dinner parties, too, serving as a delicious side that pairs effortlessly with soups or stews. oh, and let’s not forget, they're the ultimate comfort food for a cozy night in.
Compared to other biscuit recipes , this one is incredibly simple and forgiving for newer cooks. no advanced techniques, just basic biscuit-making methods that ensure you can totally nail it, even on your first try! it’s like a warm hug from your oven, wrapped in buttery goodness.
The Delicious Details
So, what do you need to get started? we’ll cover that in the ingredients section, but trust me, having good baking essentials on hand makes all the difference.
This is one of those recipes where you can play with the ingredients a bit, too. think shredded cheese or herbs for a savory twist, which might just make your biscuits the star of the show!
And hey, if you’re exploring flavors, consider brushing the tops of your biscuits with melted butter before baking. Seriously, you’ll be thanking me later.
In the next section, i’ll list all the ingredients you’ll need to whip up a batch of these fluffy buttermilk biscuits.
Getting your hands in that dough is so fun , and i can promise you, they taste even better than they smell.
Stick around; your kitchen is about to transform into a little slice of southern heaven!

Essential Ingredients Guide
When you're gearing up to bake some baking buttermilk biscuits - fluffy & quick , the foundation of your culinary adventure starts with the right ingredients.
Let’s break it down into some super useful sections that'll make your biscuit-making a breeze!
Premium Core Components
First off, let’s talk about measurements . If you want your homemade biscuits to turn out just right , keep these handy:
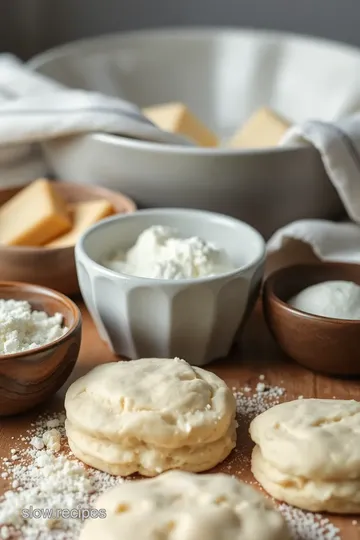
- All-purpose flour : 2 cups (240g) – Gotta have that base!
- Baking powder : 1 tablespoon – It’s what makes those biscuits rise.
- Salt : 1 teaspoon – Adds some zing!
- Baking soda : 1/2 teaspoon – Works in tandem with buttermilk.
- Cold unsalted butter : 1/4 cup (57g) – For that buttery flavor and flaky texture.
- Cold buttermilk : 3/4 cup (180ml) – The secret to tenderness.
Quality indicators ? look for flour that feels soft but a bit gritty, like sand, and butter that’s properly cold .
You’ll want to store your dry ingredients in a cool, dry place. as for buttermilk? keep it in the fridge, and it’ll last up to 2 weeks if you haven't opened it.
Freshness tips ? Always check the expiration date on baking powder and baking soda. Old leaveners make for sad, flat biscuits.
Signature Seasoning Blend
When it comes to flavor, don't sleep on the spices and herbs ! That’s how you elevate your biscuits from good to mind-blowing .
You might want to consider:
- Mixing in a teaspoon of herbs like thyme or rosemary for a tasty twist.
- Adding a pinch of black pepper for that slight kick.
In Southern cooking, it’s common to pair biscuits with savory dishes, like sausage gravy. If you’re feeling fancy, throw in cheddar cheese for flavorful biscuit recipes!
Smart Substitutions
We all have those moments when we realize we're out of something crucial. No panic—here are some common alternatives :
- No buttermilk? Just mix 3/4 cup of regular milk with 1 tablespoon of vinegar or lemon juice. Voilà—southern comfort food made easy!
- If you're looking for healthier options, try whole wheat flour instead of all-purpose.
- Need to make it dairy-free? Coconut oil works great, just like butter.
And don’t forget about some seasonal fresh herbs . They’re aromatic and add a surprise flourish!
Kitchen Equipment Essentials
Now, let’s chat equipment. You really don’t need a high-tech kitchen to whip up those fluffy biscuits . Here are some must-haves:
- Mixing bowl : Just make sure it’s big enough to handle your flour cloud!
- Pastry cutter or fork will be your best friend for cutting in the butter.
- A baking sheet lined with parchment paper means less mess and easier clean-up.
A fun little tip? If you don’t have a biscuit cutter, the rim of a glass works perfectly. And if you want extra flakiness, remember to chill your dough before cutting!
Baking Tips and Tricks
Okay, here are a couple of essential baking tips for beginners that I had to learn the hard way:
- Cold is key ! The colder your butter and buttermilk, the lighter and fluffier your biscuits will be.
- Don’t fret if your dough is messy; that's just part of the process. It's about having fun, right?
With all that in mind, you’re set to dive into your baking buttermilk biscuits - fluffy & quick journey. by using the right ingredients, clever substitutions, and some smart equipment, you’ll be amazed how easy it is to create those tender biscuits everyone loves.
Are you ready to roll up your sleeves and mix some dough? let’s go! up next are the mouth-watering steps to take!
Professional Cooking Method: Baking Buttermilk Biscuits - Fluffy & Quick
When it comes to whipping up some seriously delicious southern biscuits , i’ve got a secret weapon—the professional cooking method! this ain't just about following a buttermilk biscuit recipe ; it's about making sure your biscuits come out light, fluffy, and perfect every single time.
Let’s break down the essential steps in a way that’s super fun and easy to digest.
Essential Preparation Steps
Mise en place is your bestie here. it means having all your ingredients prepped and ready to go. measure out your 2 cups of all-purpose flour , grab that cold butter , and make sure your buttermilk is nice and chilly too.
This step makes everything smoother and less stressful.
Time management? oh boy, i’ve messed that up before! here’s my tip: prep your ingredients maybe a few minutes before you turn on the oven.
Your total time for this is only about 35 minutes —including 15 minutes of cook time at 450° f ( 232° c) .
Trust me, you can do this while sipping on coffee.
Now, let’s talk organization. keep your workstation clean and clutter-free. it’ll help you focus. and don't forget safety first! always be careful when using sharp tools.
Knives and biscuit cutters can be sneaky!
Step-by-Step Process
- Preheat your oven. You want it nice and hot for those flaky biscuits.
- In a bowl, whisk together the flour, baking powder , salt, and baking soda . Easy peasy!
- Cut in the cold butter until it resembles coarse crumbs. It's all about that texture!
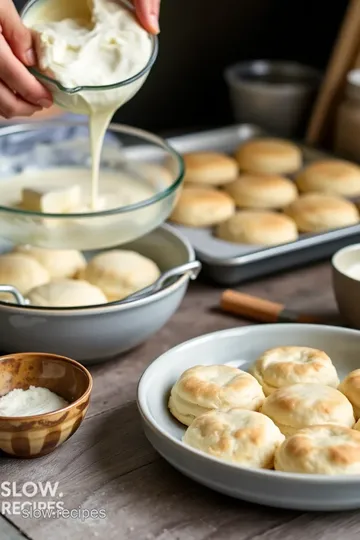
- Then, pour in the cold buttermilk. Stir until just combined. Seriously, less is more here—overmixing can lead to tough biscuits.
- Turn the dough out onto a floured surface and knead it a few times until smooth.
- Roll it out to about 1/2 inch thick and use a biscuit cutter or glass to cut them out. You've gotta love those little circles!
- Place them on a parchment-lined baking sheet.
- Bake for 12- 15 minutes , until the tops are golden brown. This is where the magic happens!
Expert Techniques
Let’s get a bit fancy here. the secret to fluffy biscuits is all about keeping your ingredients cold, especially the butter.
Cold butter creates steam while baking, which helps those biscuits rise. and don’t forget to check the visual cues for doneness ! those golden tops are your golden ticket.
Now, if you mess this up (trust me, i have!), don’t sweat it. troubleshooting tips: if your biscuits come out too dense, next time try not to over-knead, and make sure your oven is at the right temperature.
Success Strategies
Here’s a little nugget of wisdom: one common mistake is overmixing the dough. just remember— less is more . for perfect results , follow the instructions closely and stay cool, but if you need to make your biscuits ahead of time, chill the dough for 10 minutes before cutting to maintain that glorious rise.
Also, you can get creative! Try adding cheese for savory biscuit goodness, or brush the tops with melted butter before baking for that extra flair!
And honestly, these homemade biscuits are not just great for breakfast. You can serve them with jam, honey, or cheese, making them great for any meal.
So there you have it! whether you're serving up these biscuits from scratch as a breakfast side or making them the star of your comfort food recipes , you’ll be rocking that kitchen in no time.
As we wrap this up, remember, this is just the beginning! There are so many flavors to explore and techniques to master.
Additional Information
Explore different biscuit serving ideas and dive into traditional Southern cooking . Experiment with healthier biscuit alternatives or fun biscuit variations to find your personal favorite. Happy baking!

Pro Tips & Secrets: Your Path to Perfect Biscuits
Alright, folks, let's dive into some pro tips and secrets that’ll have you baking those beautiful, fluffy buttermilk biscuits like a southern grandmama.
I've been there—baking can feel daunting, but it really doesn’t have to!
When it comes to time-saving techniques , you can mix your dry ingredients the night before. then all you need to do is add the wet ingredients when you’re ready to bake.
Easy peasy, right? also, if you have a bit more time, let the dough chill before rolling it out. chilling helps the biscuits rise even higher.
Trust me, it’s worth the wait for that extra fluff!
Now, if you're wondering how to get that delicious buttery flavor, here’s a little secret: add a brush of melted butter on top of your biscuits right before they head into the oven.
It not only boosts the flavor but gives you that golden-brown color that screams “take a picture of me!”
And when it's time to present your biscuits, think saturation! Use color combinations that pop. Maybe a touch of fresh parsley on top or a drizzle of honey—just something to make that plate sing!
Perfect Presentation: Making Your Biscuits Shine
You know what they say: we eat with our eyes first! for the perfect presentation , let’s chat about some quick but effective plating techniques .
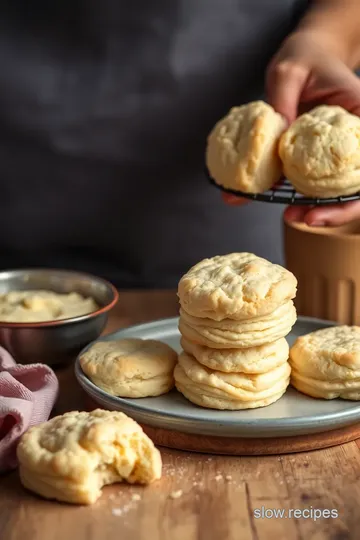
I like to stack two or three biscuits on a plate. it looks impressive and gives that "i'm fancy" vibe.
For garnishes, keep it simple yet delightful. a sprinkle of flaky sea salt? yes, please! or try some fresh herbs for that rustic touch.
You could serve them with a pretty little dish of jam on the side. let your guests slather it on, and what do you know? instant fancy brunch appeal!
Visual appeal tips can elevate your biscuits from ordinary to extraordinary. pairing your biscuits with contrasting colors can seriously wow your guests.
Think bright, juicy strawberries next to golden biscuits—now that's a scene stealer!
Storage & Make-Ahead: Keep ‘Em Fresh
As much as we’d love to devour the whole batch, sometimes you might have leftovers. here’s where the storage guidelines come in.
Let your biscuits cool completely before storing them in an airtight container. they can hang out in the fridge for about 2-3 days.
If you’re thinking about make-ahead options, you can freeze your biscuit dough! just shape them, place on a baking sheet until firm, then transfer to a freezer bag.
When you're ready, no need to thaw—just bake a minute or two longer. honestly, who doesn’t love that kind of convenience for quick biscuit mornings?
To reheat leftover biscuits, pop them in the microwave for about 10-15 seconds or in a toaster oven until warm. They’ll be almost like new!
Creative Variations: Spice It Up!
Baking buttermilk biscuits is a classic, but one of my favorite things? the variations! feel free to shake it up with your own flavor adaptations .
Want something cheesy? toss in some shredded cheddar or a sprinkle of parmesan for a savory kick.
For a fun twist, try adding seasonal ingredients. think spooky halloween herbs, or cozy flavors like sage in the fall.
Honestly, you can craft a thousand different types of biscuits. and don't forget dietary modifications . swap buttermilk for a dairy-free option like coconut milk mixed with lemon juice.
Everyone deserves a flakey homemade biscuit, right?
Complete Nutrition Guide: Know Your Biscuits
Now let’s get real for a second—what are we actually putting in our bodies? i’ve got a handy nutrition breakdown so you know exactly what’s in those fluffy biscuits.
They’re around 180 calories each—perfect for a breakfast side dish or a warm snack. keep in mind that adjusting the ingredients can tweak the nutrition.
Want something a tad healthier? try whole wheat flour!
Biscuits aren’t just tasty; they can be comforting, too! But just be aware of portion guidance . Two biscuits is usually a good rule of thumb—especially with a nice cup of coffee to wash them down!
Expert FAQ Solutions: Got Questions? I’ve Got Answers!
You might have some burning questions about your biscuit journey, and that’s okay! let’s tackle some common questions . if your biscuits aren’t rising, check that your baking powder is fresh.
It can make or break the fluffiness!
For those who find themselves with a dough that's too sticky, dust your fingers with flour or lightly sprinkle more flour onto your work surface.
Remember: less is more. a little flour goes a long way in biscuit making.
Baking is all about trial and error. So, no sweat if it doesn’t turn out perfect the first time. Keep trying, and soon you’ll be the biscuit queen or king of your kitchen!
In Conclusion: Get Your Biscuit Game On!
With these tips and tricks, you’re all set for baking buttermilk biscuits - fluffy & quick . get creative, explore those variations, and don’t hold back.
The world of biscuits is at your fingertips! i believe you can whip up the best buttermilk biscuits your family has ever tasted.
Happy baking, y’all! 🥳

Fluffy & Quick Buttermilk Biscuits Card

⚖️ Ingredients:
- 2 cups all-purpose flour (240g)
- 1 tablespoon baking powder
- 1 teaspoon salt
- 1/2 teaspoon baking soda
- 1/4 cup unsalted butter, cold and cubed (57g)
- 3/4 cup buttermilk, cold (180ml)
- Butter (for spreading)
- Jam or honey (for spreading)
🥄 Instructions:
- Step 1: Preheat the oven to 450°F (232°C).
- Step 2: In a mixing bowl, whisk together flour, baking powder, salt, and baking soda.
- Step 3: Cut in cold butter using a pastry cutter or fork until the mixture resembles coarse crumbs.
- Step 4: Add buttermilk; mix until just combined to form a soft dough.
- Step 5: Turn the dough onto a lightly floured surface; gently knead a few times until smooth.
- Step 6: Roll out to about 1/2 inch thick; use biscuit cutter to cut out biscuits.
- Step 7: Place biscuits on a baking sheet lined with parchment paper.
- Step 8: Bake for 12-15 minutes or until the tops are golden brown.
- Step 9: Serve warm with butter, jam, or your favorite spread.
Previous Recipe: How to Make My Zesty Roasted Corn Salad: A Flavorful Summer Delight!
Next Recipe: How to Mix Hawaiian Macaroni with Creamy Dressing: A Tropical Delight
